Snowfall and Ice Calls for Creative Southerners

Transform your pool float into a sled. Image courtesy of Funboy's video, found at: https://www.youtube.com/watch?v=Fkd0j658dfQ

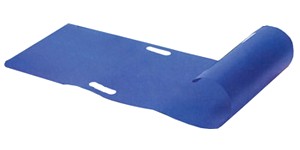
Transform your pool float into a sled. Image courtesy of Funboy’s video, found at:
https://www.youtube.com/watch?v=Fkd0j658dfQ


The move is over and little did we know how much snow was possible in the South. Thankfully, we kept the winter gear to visit family in New York. But now it’s here, we need to have some fun.

Don’t Have a Sled? No Problem!

Many of us don’t have a sled taking up space in our non-basement houses or apartments. Fear not! Instead of trying to find a store that has one, transform what you already have.

Idea 1:

Use your beach and pool gear to ride the hills. Blow up plastic rafts, alligators, Boogie Boards, and even a hard shell (or blow-up) kiddie pool can offer a quick fix when a sled isn’t available.

In NY, we used our blow up, glow-in-the-dark chairs on big hills at night. They provided a cushion to the often unexpected rugged terrain and when “charged” correctly under a lamp, provided visibility. If you have a fabric-coated beach raft, just add a large garbage bag and you’ll be slipping and sliding ASAP.

Idea 2:

I wish I could say this was my idea, but a friend mentioned she saw kids riding cookie sheets. Those large ones would work pretty good for a single, small child. Think of them as smaller saucer sleds. To make them really take off, I bet you can use the techniques from Living Strong to make them glide faster.

Idea 3:

Cardboard sleds can be made from leftover pizza boxes, refrigerator boxes, or even a leftover school project made on foam board. To lengthen your use time, cover the cardboard (multiple sheets stacked are best, but not necessary), with a large garbage bag or plastic from gardening/window insulation. Take duct tape and secure it together.

Idea 4:

If you lack cardboard, beach toys, or large cookie sheets, all is not lost. Big pieces of plastic used in gardening or insulation can be used on their own in a bind. Just sit on them and roll the front up like one of those plastic roll-up sleds. But be prepared to feel every bump.

Warning to Newbies About Sledding

People who are not seasoned snow daredevils need to heed these words: Getting hurt while sledding is easier than you think. Even with real sleds. If you’re unfamiliar with the terrain of the hill (rocks/holes hide easily under snow) or are not gauging the speed of your descent, you may find yourself seriously injured. This is not to scare people off of the idea of sledding, but just a fair warning to use any sled with caution. Especially when you don’t know how your sled will react to the snow conditions(yes, it varies).

The first few trips should be taken on a small hill. Jump or roll off your sled if you see a head-on collision about to occur with things such as trees or people. I’ve seen a few accidents over the years that necessitated a call to 911.  With that being said: Be safe, dress warm, have fun, and don’t forget cups and a Thermos of hot chocolate!

Looking for other solutions for sleds? Check out Bob Vila’s DIY Sled Making.


Sometimes Simple does the Job

Banana Dolphins. Image courtesy of Luz's Unique Creations on Facebook.

Banana Dolphins. Image courtesy of Luz’s Unique Creations on Facebook.

We’re all in to creating, or at least most of us that visit this page, but sometimes…doing something so simple does the job in a big way: It puts a smile on the faces we love. Here is a healthy snack that only takes minutes to create.

You’ll need:

Bananas (washed)
Grapes – green and red (washed)
Small Containers
A Knife
A Black Marker (non-toxic)

1) Fill containers with grapes of both colors, leaving enough room for the banana to stick in.
2) Cut the end tip of the banana long enough to hold a grape and mimic a mouth.
3) Use the marker to make dots for the eyes of the dolphin.
4) Place each banana into the container, pull apart his mouth and place a grape in it.

Option 2: For Those with more Time on their Hands

Looking at this idea, another one came to mind: Instead of using grapes for inside the container, make blue gelatin.This can be achieved by either making the blue gelatin in a large bowl and after it firms up, scooping up pieces( it will look like waves) into each container or just pouring the gelatin into each individual container(which could be more cumbersome in the refrigerator), but it will look like still waters.
Place the cleaned and prepared bananas (as in in directions above) into the gelatin and place an orange fish cracker in the mouth.You can also scatter a few crackers on top of the “water.” Enjoy!

I Only Have Eyes for You

Who could resist this Bento? Image Ghost Onigiri courtesy of FlickrCC.net.

After posting several ways to make edible eyes on this blog, I still get excited when I see more ways to use them. Anna the Red’s Bento and Plush Factory has posted over 60 edible characters that would make anyone smile.

What a great way to entice your kids to eat their veggies. The Power Puff Girls platter has to be one of my favorites! Which is yours?

Not the Gingerbread Cookies Your Grandma Made

Seeing Eye to Eye

Zombie cookies, courtesy of Cake Central and Corrie76

This is fabulous! I think I will combine the zombie cookie idea from Cake Central by Corrie Cakes, with the DIY Royal Icing Eyes from Craft Gossip coupled with an idea of my own.

Since edible eyes at the store are pretty pricey (approx. 75 for 5 bucks), I had been thinking about how to make the eyes cheaper.

A few weeks ago, I picked up candy buttons for my daughter. They were on sale for a dollar a package(450 dots). She was munching on them when I got inspired. Why not get some food coloring, use a toothpick or small brush and make them eyes? I could add red veins and more!

Take a toothpick, dip it in a drop of food coloring and paint the candy buttons. So quick and easy! Photo courtesy of Debbie Morrow.

It was an easier alternative to making multiple batches of varying colored dots and it took less than 10 minutes to go from painting the eyes to being able to use them.

Since I make a huge spread of gruesome treats at my Halloween Bash, I’ll now have more than enough eyes at a reasonable price. Thank you my creative friends for inspiring me again!