A New Inspiration in Gruesome Food

If you’ve read my recent post The Guilty Pleasure of Making Gruesome Foods, then you won’t be surprised that I am in awe of Kim Atkinson Fiorini‘s food serving idea. I believe she made it for a Walking Dead party.

What a way to serve a spread of meats! Image courtesy of Kim Atkinson Fiorini.

What a way to serve a spread of meats! Image courtesy of Kim Atkinson Fiorini.

Either way, I’m in complete awe on this one! I have to say this is THE BEST idea I have seen for serving meats on a table for Halloween or as in a zombie party. I can really see this work for a zombie wedding too! Thanks Ms. Fiorini for your creativity!

The Guilty Pleasure of Making Gruesome Foods

A body cavity cake with ribs made from white chocolate and every organ is made with a different flavor cake and filling. Image courtesy of Debbie Morrow. All Rights Reserved.

A body cavity cake with ribs made from white chocolate and each organ made of a different flavor cake and filling. Image courtesy of Debbie Morrow. All Rights Reserved.

Confessions of a Party Planner

I must confess: it is a highlight for me to get an emotional response from guests before they even taste a morsel at my Halloween parties. But beyond their visual appeal (or gruesome effect), it has to be undoubtedly tasty.

Luckily, it usually only takes a few brave souls to initiate the tasting of horrifying foods and giving them the thumbs up. Word-of-mouth is very powerful and thanks to those who initiated the food fest, a chain-reaction will occur of good conversations, laughs, and most importantly, everyone else digging in.

Below you’ll find awe-inspiring Halloween recipes that have been tested by my own party attendees or are on my “must try” list from my peer’s tried and true recipes. Continue reading →

DIY Witch Shoes and Broom Outdoor Decoration

This failed cabbage pot was the perfect place to set my DIY witch shoes and props. Image courtesy of Debbie Morrow, All Rights Reserved.

This failed cabbage pot was the perfect place to set my DIY witch shoes and props. Image courtesy of Debbie Morrow, All Rights Reserved.

Looking for a quick and easy Halloween decoration? These ordinary granny boots can be transformed into a great prop in less than an hour(depending upon drying time if paint is needed).

You’ll Need:

One Pair of Lace-Up, Spiked Boots (an easy secondhand store find)
Black Spray or Waterproof Acrylic Paint (If boots are not black, purple, or burgundy)
Seasonal Ribbon and/or Halloween Shoe Strings
2 Pieces of Styrofoam (to fit from inside heel to top edge of boot ankle)
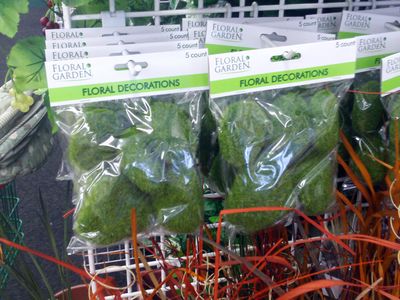
Moss
6 Small Halloween Floral Bunches (Dollar Tree item)
A Low Heat Glue Gun/Glue Sticks
A Broom (pictured is one from Dollar Tree, but Kidspot has a video on how make your own)
*Optional: Witch Sign, Skull, Extra Brooms of varying sizes/styles, and lights.

Directions: Continue reading →

A New Samara’s Well from the Movie “The Ring”

From left to right: Original stone-casted well weighing over 40 pounds The same well after about 10 years of elements and lawn mower hits. The newest well on right taking 3 days to make and only 5 pounds. Images courtesy of Debbie Morrow, All Rights Reserved.

From left to right: Original casted well weighing over 40 pounds. The same well after about 10 years of elements and lawn mower hits. The newest well on right taking 3 days to make and only 5 pounds. Images courtesy of Debbie Morrow, All Rights Reserved.

Desperate Times Calls for Desperate Measures

Many times I can work better under pressure. This is one of them. When my Ring Girl Well was destroyed between lawn mower hits and age, I was at a loss for a few days. Since I’m still recovering from back surgery I couldn’t think of any possible way to achieve the rock casting and the bending needed to either repair or make another well as in my older Ring girl well tutorial.

Light Bulb Moment

Continue reading →

The Mayor of Nightmare Before Christmas Tutorial

It took over 50 PVC cuts to make the Mayor but it was so worth the effort. Image courtesy of Debbie Morrow, all rights reserved.

It took over 50 PVC cuts to make the Mayor but it was so worth the effort. Image courtesy of Debbie Morrow. All rights reserved.

For those who have been waiting a year – I’m so sorry for being so tardy. If you’ve followed me in any way – you’ve seen I lost a huge part of my heart the day after Halloween – which has thrown me off kilter.

My loyal friends gently reminded me of my promise to post the tutorial – so here it is – the images are added first and then some explanation will follow with a specs sheet – that has all the measurements. Please read all before starting your project.


Don’t forget to write the word “Mayor” in Black permanent marker in white circle of ribbon. Putting Head and Hat Together: Cut a long piece of PVC pipe, slide the head on through the hole (make sure it can move so you can switch the head view when you feel like it).

Slide the black circle you cut earlier over top of head and place your PVC shish-ka-bob style piece into the “T” at the neck part of the “H” frame. Top the hat with a piece of pool noodle and cover with black fabric with a hot glue gun. Make a strip of grey trim fabric around hat and glue. * You’ll notice that the black rim of hat made out of foam board shows the white inside – use your black paint to touch that up all the way around.

The hands are made similar to my Sally, Jack, and Ring Girl. I added a stripe to a cheer horn to give it a “Tim Burton-ish” feel ( a word from the book of Deb).

Specs. Sheet:

Mayor Specs DIY Nightmare Christmas

If anyone has an issue opening the PDF specs. sheet, please feel free to shoot me an email so I can send you the word document. If anyone has a question, please don’t hesitate to email me too. Happy Prop Building!


Cat Costumes Perfect for a Photo Shoot

I can imagine this perfect cat costume in a photography studio. Image courtesy of Kittybloger.wordpress.com.

I can imagine this perfect cat costume in a photography studio. Image courtesy of Kittybloger.wordpress.com.

Now that it is time to mull over what costume to choose this year – don’t forget your favorite pet. Kitty Bloger has some wonderful images of cats in costumes.

Newzshop also includes some images from Kitty Bloger and others – if you’re really interested in dressing your cat.

As for your other animals, I’ll save that for a later post.

* Please note: For the sake of animal love, only dress cats(or other animals) that truly enjoy it. Otherwise this might seem a little cruel. Thanks!


Ramping up: Prop Ideas for Halloween 2014

An interactive exhibit of a Paper Craft Guillotine by Mandy Smith. Image Courtesy of Make.

An interactive exhibit of a Paper Craft Guillotine by Mandy Smith. Image courtesy of Make.


I know…it’s still summer. But this is the time I like to think about what I’d like to make for Halloween. Whether I can actually accomplish the things I dream of making…well – that’s another story. I’ve just had back surgery (all those hours of prop making can do a lot of wear and tear after so many years). But don’t count me out just yet.

Planning Ahead Saves Money

By making your plans and item lists early, you can save a bundle. Especially in garage sale season because you can pick up a plethora of items for pennies on the dollar. You can also find priceless stuff on the curb.

The Newest Prop to Love

While in my Reader, I found an awesome prop idea from Make. It is a paper craft guillotine that was used in an exhibit. I’d love to make one for the kids to try out. You’ll find it at Vimeo:

Unsure of what this season holds for me, I’d appreciate all my creative counterparts to start posting their ideas and if you accomplish your dream prop, shoot me a pic and a quick note so I can highlight you on my blog. Thanks!

Twas the Night After Halloween…

Twas the night after Halloween and all through the house, not a creature was stirring, not even a mouse…Because we were all so tired from celebrating! Here was the yard this year and a highlight of costumes at the Halloween Bash.

This slideshow requires JavaScript.

Below are a few memorable costumes from our annual Morrow Halloween Bash. I’m sorry for so few. My photographer aka my husband was having such a great time he forgot his job for the night.

This slideshow requires JavaScript.

Tutorial Writing – Not an Easy Task

The head for the Mayor from The Nightmare Before Christmas is made from a garbage can squashed a little. Image courtesy of Debbie Morrow. All Rights Reserved.

The head for the Mayor from The Nightmare Before Christmas is made from a garbage can squashed a little. Image courtesy of Debbie Morrow. All Rights Reserved.

For those who are looking forward to the Mayor tutorial, you may have to wait a little longer than expected. I’ve already started the first of the series, which is probably the most daunting.

This is not a task to take lightly. I must step into the shoes of a person who has no knowledge of PVC frame building.

With over 40 cuts of PVC needed to make the frame along with finding the word usage for the assembly – it will take several days to add the steps in a clear, concise manner.

I have reread and edited after taking a break, in order to help those who are really interested in building it. Will they have the directions in time for Halloween? Probably not.

I’m sorry to disappoint those who were waiting. Yet, it is more important to give accurate and clear directions rather than posting pics without guidance.

DIY: Transforming the Easter Bunny into a Zombie

This zombie bunny looks thirsty. Image courtesy of Debbie Morrow. All rights reserved.

This zombie bunny looks thirsty. Image courtesy of Debbie Morrow. All rights reserved.

With The Walking Dead, Warm Bodies and other zombie movies warming our hearts, how could we not want to make zombies of our own?

To make this zombie bunny you’ll need:

1 Blow mold bunny (Craigslist and Ebay)
Outdoor craft paint – red, dark green, white, and black
Paint brushes with small tips
Small cups or an empty egg carton to mix colors
Pumpkin Teeth (Walgreens, Walmart)
Hammer
Metal shish-kabob skewer or roofing nail
Paper towel (cheapest brand works best)
Water

Directions: Continue reading →